Use SVN externals to Simplify Working with Multiple Projects
The SVN externals feature is one of the most useful but underutilized feature of SVN.
Many projects require assets that already exist in other repositories, and handling linking to these assets often leads to messy and confusing project structures.
There are three approaches to include linked assets:
1. Copy the assets into your current project via SVN export
This is icky! You’re unnecessarily duplicating code and resources. If the linked code is later improved or refactored or debugged, your project will be stuck with a static branch of the linked code and not receive the updates.
2. Add the assets as a linked library
This is also very unsatisfactory. The linking is an artifact of the project on your computer, but not part of the project itself. So, if someone checks out the project from SVN, they will have to determine which linked libraries to include. If your projects are documented perfectly, this is not a big deal, but still adds unnecessary extra steps. If in the very typical case, however, confusion blooms because it’s not clear which linked libraries are required.
3. The better solution: SVN Externals
This embeds a dynamic link into your project that points to assets in another SVN repo location.
Advantages:
- If the linked project is changed, you’ll get the latest version when you do an SVN update on the entire project.
- The SVN extern properties are part of the project. When a new user checks out the project, they get the link to the external assets as well.
What if you need to link a specific version of the shared assets?
Make a tag of the desired build of the shared assets and link to the that tag via SVN externals.
Setting up SVN Externals in Eclipse
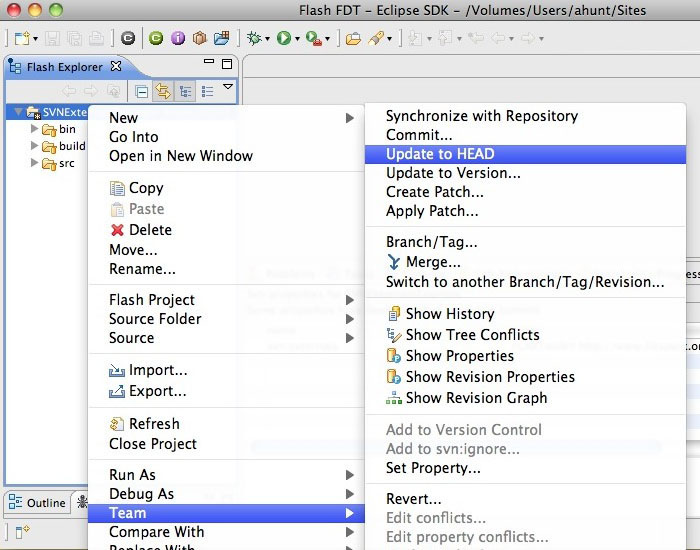
These screen shots show how to set up SVN externals in Eclipse with
the Subclipse plugin. The steps should be very similar with TortoiseSVN
or whatever tool you have at hand.1. Go to the SVN Set Property Dialog:
4. What you should see after you hit ok.
6. Look! The linked project appears as a directory within your project!


0 comments:
Post a Comment